

Tiling: Why and how to start?
Tiling is one of the oldest and most practical arts, which today is used not only for decorating walls and floors, but also for creating a unique and distinctive atmosphere in homes. This process involves installing tiles that can give a space a stylish and lasting appearance. DIY home tiling gives you the opportunity to handle small and large projects by yourself without the need for professional workers, and to enjoy the results. One of the major advantages of DIY home tiling is that it allows you to transform your living space and even make quick and cost-effective updates in various areas.
But the question is, why should you do it yourself? The answer is simple: saving money and achieving customized results. If you also want to play an active role in improving your home’s appearance, tiling can be an excellent option. In the following, we’ll introduce you to the tools, steps, and tips needed for a successful tiling project.
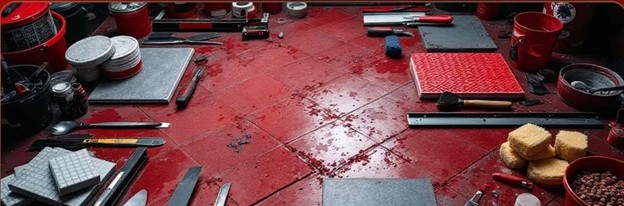
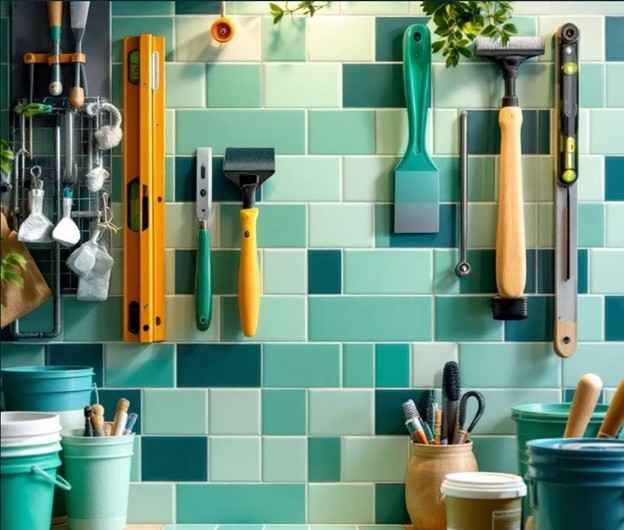
Tools and materials needed for home tiling
To get started with tiling at home, you’ll need some essential tools, each playing a key role in doing the job correctly. In this section, we’ll introduce these tools and explain how to use them properly.
Trowel: The trowel is one of the primary tools for tiling, used to spread adhesive on the surface. Its unique shape helps the adhesive spread evenly and appropriately.
Tile cutter (or tile saw): To cut tiles to your desired sizes, you’ll need a specialized tile cutter. These cutters are equipped with blades designed to make clean cuts without cracking the tiles.
Tile adhesive: This material is used to attach tiles to walls or floors. There are various types of adhesives, and you should choose one based on the needs of your project. Powder-based and paste adhesives are the most common types.
Level: A level is used to check the vertical and horizontal alignment of the tiles. Using a level during installation ensures the tiles are placed accurately and evenly.
Tile nippers: If you need more precise and fine cuts, tile nippers are ideal. They allow for detailed cuts in corners or areas that require extra precision.
Screws and anchors: Some projects require attaching tiles to harder surfaces. In such cases, using screws and anchors is necessary to secure the tiles firmly.
With these tools and proper usage, you can carry out the tiling process smoothly and accurately.
Steps to prepare the environment for tiling
Before you start installing the tiles, you need to fully prepare the surface. This preparation ensures that the tiles adhere properly and that the final result is highly satisfactory. Below are the detailed steps for surface preparation.
Cleaning the surface: Begin by thoroughly cleaning the wall or floor. Any dust, grease, or debris must be removed. This helps the tile adhesive bond more effectively to the surface.
Leveling the surface: After cleaning, the surface must be smooth and even. If the wall or floor is uneven, you should fix it using a repair mortar or primer. This allows the tiles to sit flat and prevents cracking or falling.
Using primer: For some surfaces, such as plaster walls, applying a primer before tiling is essential. The primer helps the adhesive stick better and ensures a stronger hold for the tiles.
Preparing the environment for tile application: Before starting the installation, make sure the room temperature is suitable. Extremely cold or hot conditions can interfere with the adhesive’s drying process and tile placement.
By following these steps, you can create an ideal environment for tile installation and be highly satisfied with the outcome.
Choosing the right type of tile for your home project
Choosing the right type of tile for your home project can have a big impact on the appearance and durability of your tiling. There are various types of tiles, each with its own characteristics and uses. In this section, we introduce these types and explain how to choose the most suitable one for your needs.
Ceramic: Ceramic tiles are usually used for floors. These tiles come in matte, glossy, and semi-gloss finishes. Ceramic tiles are suitable for areas with high foot traffic.
Porcelain tiles: These are a denser form of ceramic and offer greater resistance to moisture and stains. That’s why porcelain tiles are recommended for humid spaces such as bathrooms and kitchens.
Stone: Natural stones like marble or granite are ideal for spaces with a luxurious and natural look. These types of stone are very durable but require more maintenance.
When choosing tile, keep in mind that each type has its own unique features and must be selected according to the space and your needs. The right choice of tile can greatly enhance both the beauty and functionality of a room.

How to choose and prepare tile adhesive correctly?
Tile adhesive is one of the most important materials needed for tile installation. Choosing the right adhesive and preparing it correctly greatly affects the durability and strength of the tile job. In this section, we’ll cover the key points in selecting and preparing tile adhesive.
Types of tile adhesive: Tile adhesives are generally divided into two types — powder adhesive and paste adhesive. Powder adhesive is usually suitable for various surfaces and must be mixed with water before use. Paste adhesive is ready-made and better suited for low-traffic areas.
Choosing the right adhesive: For humid areas like bathrooms or kitchens, it’s recommended to use moisture-resistant adhesives specifically made for porcelain tiles. Also, large or heavy tiles require high-strength adhesives for proper support.
Preparing the adhesive: Once you’ve selected the right adhesive, it must be properly prepared. If using powder adhesive, you’ll need to mix it with water until it reaches the proper consistency. Be sure to follow the manufacturer’s instructions for the correct water-to-adhesive ratio so it performs effectively.
With the right adhesive and proper preparation, you can ensure your tiles are securely installed and built to last.
How to measure and cut tiles for installation
One of the most important steps in tiling is precise measuring and cutting of the tiles for installation. This stage requires high accuracy to ensure a clean and organized final result. In this section, we’ll explain step-by-step how to measure and cut tiles properly.
Accurate measuring: Before starting tile installation, you must carefully measure the dimensions of the wall or floor. Use a tape measure or a level, and make sure all measurements are precise.
Cutting the tiles: To cut tiles, use a tile saw or tile cutter. Make sure you use the right tool for the type of tile you’re working with to ensure clean and accurate cuts.
Complex cuts: In some cases, you’ll need to make more complex cuts for corners or edges. For these, use tools like a hand saw or a specialized tile cutting machine to achieve clean, precise results.
By following the steps for accurate measuring and proper cutting, you can achieve a high-quality, professional-looking finish.

Tiling the walls: from base to top
Tiling the walls requires precision and planning. In this section, we will explain the steps for installing tiles on the wall, so you can successfully complete this project.
Starting from the bottom: When installing tiles on the wall, always start from the bottom. This helps ensure that the tiles are aligned properly and the surface remains neat and even.
Using a level: To install the tiles accurately, use a level to ensure the tiles are aligned both vertically and horizontally. The level helps you adjust the tiles during installation and prevents the work from becoming messy.
Installing rows: Each row of tiles should be installed carefully on the surface. Ensure the spacing between tiles is uniform, and use spacers or tile clips to maintain the gaps.
Finishing up: After all the tiles are installed, let the adhesive dry completely. Once dry, you can clean the tiles and, if necessary, use grout to fill any gaps.
By following these steps, you can tile your walls beautifully and enjoy the result of your work.
Floor tiling: special tips for proper installation
Floor tiling is one of the most important and challenging stages of tiling. If you plan to tile the floor of your house, kitchen, or bathroom, paying attention to special tips and being meticulous in the process can make a significant difference in the outcome. Here are some important tips for floor tiling and avoiding common mistakes.
Accurate surface preparation: Before anything, the floor surface should be thoroughly cleaned and smooth. Any dust, stains, or debris should be removed. If the floor surface is uneven, use a repair mortar to level it out.
Start tiling from the center of the floor: To ensure the tiles are placed evenly and aligned across the floor, you should start from the center. This ensures that the outer edges of the floor are evenly aligned with the walls.
Using a level for installation: One of the most important tips for installing floor tiles is using a level. The level helps ensure both horizontal and vertical alignment of the tiles, leading to a smooth and flawless result.
Maintaining consistent gaps: When installing the tiles, make sure to maintain consistent spacing between them by using spacers. This ensures that the floor looks neat and visually appealing.
Using the right adhesive: For installing floor tiles, use adhesives specifically designed for this task. The right adhesive can greatly affect the durability and strength of the installation. Ensure the adhesive is spread adequately on the surface so that the tiles bond well and securely.
By following these tips, you can easily create a well-tiled and durable floor.

Aligning tiles: How to accurately and level tiles?
Leveling tiles is one of the crucial steps in tiling. Properly leveled tiles ensure that the installation is neat and aesthetically pleasing, and the final result looks clean and orderly. In this section, we’ll discuss how to level the tiles correctly.
Using a level: To begin, you need to use a level. This tool helps you align the tiles both horizontally and vertically. Using a level at every stage of the installation, from start to finish, is crucial.
Installing the first row: Start by installing the first row of tiles and ensure that they are level. After the first row is installed, continue using the level to check the subsequent rows, ensuring all the tiles are aligned and evenly spaced.
Adjusting tile positions: If you notice that a tile is not aligned with the level line, adjust it immediately. Tools like a rubber mallet can be helpful to position the tiles correctly.
Properly leveling the tiles not only enhances the aesthetic of the installation but also increases the durability of the setup.
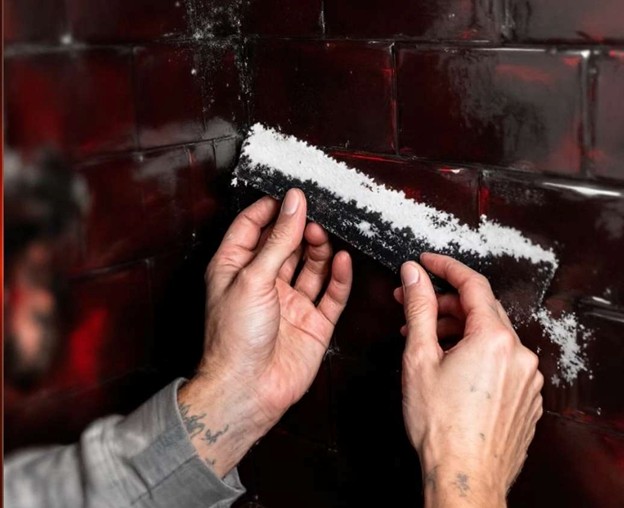
How to fill the space between tiles?
After installing the tiles and allowing them to adhere to the surface, the next step is filling the gaps between the tiles. This step helps cover the spaces and creates a neat and tidy appearance. Here’s how to fill the gaps using grout.
Choosing the right grout: The first step is selecting the right grout. Grouts are typically made from powder or paste and should be chosen based on the tile color and installation location. For floor tiles, grouts with high durability and moisture resistance are more suitable.
Preparing the grout: After choosing the grout, you need to prepare it according to the manufacturer’s instructions. If you’re using powder grout, mix it with water until you reach the desired consistency.
Applying the grout: Use a specialized tool, like a spatula, to apply the grout. Spread the grout over the gaps between the tiles, then use the spatula to remove the excess from the surface.
Cleaning the joints: After applying the grout, clean the surface of the tiles using a damp sponge. This will ensure the tiles maintain a clean appearance and that the grout stays correctly in the gaps.
Allowing the grout to dry: After applying the grout, let it dry completely. This step is crucial because incomplete drying can affect the quality and durability of the installation.
By following these steps, you can properly fill the gaps between tiles and achieve a clean and tidy result.
Care and maintenance of tiles after installation
After installing the tiles, maintaining them is essential to preserve their beauty and durability. In this section, we’ll go over methods for cleaning and maintaining your tiles.
Regular cleaning: To keep the tiles looking good, it’s important to clean them regularly. Use gentle cleaning solutions and a soft cloth to wipe down the surface of the tiles to prevent scratches and damage.
Preventing stains: Using a proper grout sealer between tiles can help prevent water and oil from penetrating the gaps. This will prevent permanent stains and dirt from forming on the tiles.
Maintaining the grout: Over time, the grout between the tiles may need to be repaired. If you notice cracks or wear in the grout, fill it again to prevent moisture from seeping under the tiles.
Avoid using harsh chemicals: Avoid using strong chemicals and abrasive tools to clean the tiles, as these can cause damage to the tile surface.
With regular care, you can maintain the beauty and durability of your tiles for a long time.
Common mistakes in tiling and their solutions
Tiling is a precise task, and mistakes can lead to undesirable results. In this section, we’ll address some common tiling mistakes and how to avoid them.
Not using a level: One common mistake in tiling is not using a proper level. This can result in tiles being installed unevenly and crooked. To avoid this, always use a level to ensure each row of tiles is aligned properly.
Not maintaining consistent spacing: Many people forget to use spacers when installing tiles, which can lead to uneven and inconsistent gaps between tiles. To prevent this mistake, always use appropriate spacers to ensure uniform gaps.
Installing tiles on an unprepared surface: Installing tiles on a rough or dirty surface can weaken the adhesive bond, causing the tiles to come loose. Ensure that the surface is thoroughly cleaned and leveled before starting the installation.
Using the wrong adhesive: Choosing the wrong adhesive can prevent the tiles from sticking properly and may lead to them coming loose over time. For each type of tile and surface, select the appropriate adhesive to ensure a strong bond.
By following these tips and avoiding common mistakes, you can achieve a professional and high-quality tiling job with lasting results.
Conclusion
Tiling is one of the best ways to improve the appearance of your home and increase its value. By following the correct steps, choosing the right tools and materials, and being careful in installation, you can achieve a beautiful and lasting result. By considering the important points discussed in this article, anyone can easily complete their home tiling projects and enjoy the results.