
Why does grout effloresce and how can we fix it?
Efflorescence on grout is one of the problems that many people face after a while on tiles and ceramics; white or powdery spots that ruin the appearance of the work and sometimes indicate the presence of moisture behind the tile. If we do not properly identify the cause of this problem, it will return even after cleaning.
In this article, we will examine in a practical and detailed way why grout effloresces, what factors cause it, what mistakes worsen this problem, and more importantly, how we can fix it properly and prevent it from recurring. By the end, you will know exactly what to do and what materials you need to prepare.
What exactly is grout efflorescence and why does it occur?
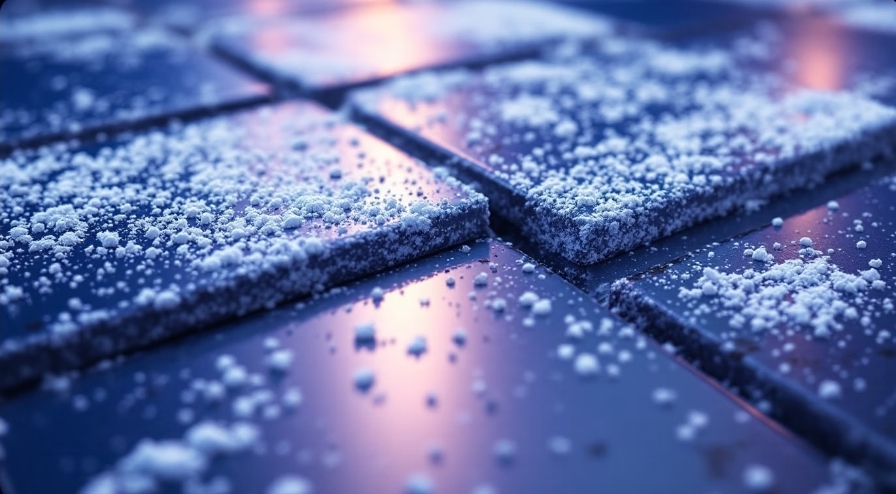
When we see white, powdery, or chalky spots on tile or ceramic grout lines, we are usually facing a phenomenon called grout efflorescence. This happens when water moves through the mortar, adhesive, or behind the tile and brings soluble salts to the surface. After the water evaporates, these materials remain as white deposits.
For this reason, efflorescence is not simply a cosmetic issue. Rather, it usually indicates the presence of moisture behind the tile, water penetration into the wall or floor, or the use of unsuitable materials.
One of the most important points that many people overlook is that wherever efflorescence appears, it means that water has previously flowed through that area. This water may come from leaks, continuous washing, excessive steam, or even residual moisture from the time of installation.
In spaces such as bathrooms, toilets, kitchens, balconies, or facades, the likelihood of grout efflorescence is higher because these areas are more exposed to water and moisture. However, in some projects, even in dry indoor spaces, efflorescence appears, which usually results from poor-quality mortar or incomplete drying of the substrate.
Another important point is that grout efflorescence typically appears gradually.
It may show up weeks or even months after installation. This timing makes many people think the problem is with cleaning or grout quality, when in fact the main cause usually lies beneath the tile surface.
From a technical perspective, efflorescence forms when three factors exist simultaneously:
Moisture, soluble salts, and a path for water to move to the surface. If we remove any one of these factors, efflorescence will not form. That is why in professional work, there is strong emphasis on waterproofing, using appropriate additives in the mortar, and proper grout application.
A practical point for many people is that cleaning efflorescence without addressing the moisture source usually does not produce a permanent result. The surface may look clean for a while, but because the water penetration path still exists, the efflorescence will return.
Therefore, before taking any action to clean or repair the grout, we must first identify the main cause. Is the problem from water penetration? From mortar quality? Or from improper installation?
Why does grout effloresce?
To properly fix the efflorescence problem, we first need to understand what causes it. Efflorescence is essentially salt deposits that come to the surface with moisture and appear as white or chalky residue on the grout after drying. However, why this happens usually relates to several important factors.
Presence of salts in the mortar or materials
One of the most common causes is the presence of soluble salts and minerals in the mortar, cement, or even the mixing water itself. Most cements contain a certain amount of salts. These salts are not visible when dry, but when moisture enters the mortar, they dissolve in the water and move toward the surface.
When the water evaporates, these salts remain on the surface and appear as efflorescence. That is why sometimes the grout looks completely clean in the first few days, but white spots appear after a while.
If the water used to mix the mortar has poor quality or is salty, this problem becomes more severe. In some areas, even the soil and substrate can be a source of salts.
Moisture penetration from behind the tile or ceramic
Another important factor is moisture penetration from behind the tile. This is very common in toilets, bathrooms, kitchens, and outdoor spaces.
When the substrate is not properly waterproofed, water enters the mortar through the floor or wall. This water finds its way through the grout and brings salts to the surface.
In such conditions, even if we use the best grout materials, efflorescence can still occur because the problem lies underneath the tile, not in the grout itself.
Improper drying of mortar or grout
If we apply the grout in unsuitable conditions, the likelihood of efflorescence increases. For example:
Applying grout in very cold or very humid weather
Washing the surface too soon
Using too much water in the mortar mixture
When the mortar does not have enough time to set and dry properly, its structure becomes weaker, and water moves through it more easily. This causes salts to reach the surface faster.
Using unsuitable adhesive or mortar
Sometimes the cause of efflorescence goes back to material selection. If the tile mortar or adhesive has poor quality or is not suitable for the environmental conditions, the likelihood of water penetration and salt movement increases.
In some projects, we see people using regular mortar in wet spaces to reduce costs. This does not cause problems in the short term, but after a while, efflorescence, tile loosening, or even hollow tiles will appear.
Constant moisture in the environment
In spaces where moisture is always present, such as bathrooms with poor ventilation or floors that dry slowly, the conditions for efflorescence are fully established.
Constant moisture causes the cycle of salt dissolution and water evaporation to repeat many times. That is why sometimes we clean the efflorescence, but it returns again after a few weeks.
Improper cleaning after grouting
Sometimes the problem comes from the cleaning stage. Using strong acids or excessive washing in the first few days can cause salts inside the mortar to be drawn to the surface.
Additionally, if water remains on the surface and does not dry properly, that same water can move the salts and create white stains.

How to remove grout efflorescence and prevent it from returning
Grout efflorescence is a common problem in homes that ruins the appearance of tiles and ceramics. If left untreated, it can gradually damage the mortar and reduce its useful life. To fully fix this problem, simply cleaning the surface is not enough. We must identify the moisture source, prepare the right tools and materials, and perform the cleaning steps properly.
Accurately identifying the cause of efflorescence
Before starting the cleaning, you need to know why the efflorescence formed. Several main factors exist:
Water penetration from behind the tile or ceramic: This is the most common cause of efflorescence in bathrooms, toilets, and kitchens. Even if the grout is excellent, moisture behind the tile can cause efflorescence.
Using unsuitable mortar or adhesive: Regular mortar or adhesive in humid environments allows water to penetrate easily and creates efflorescence.
Incomplete drying of grout: If the grout comes into contact with water before fully drying, or if the environment is too humid, salts come to the surface.
Soluble salts in materials: Cement and sand can contain soluble salts that come to the surface when moisture penetrates.
Poor ventilation: In environments with no air circulation and high humidity, efflorescence forms faster.
Important note: Until we fix the main cause of efflorescence, cleaning will only provide a temporary result.
Tools and materials needed for cleaning
To clean efflorescence, you need the right tools and materials to ensure complete cleaning without damaging the grout or tile. These tools include:
Soft brush or sponge: For cleaning surface deposits without scratching the grout.
Efflorescence cleaner: Non-acidic compounds that specifically dissolve salt and lime deposits.
Bucket of clean water and dry cloth: For rinsing and drying the surface after cleaning.
Gloves and safety glasses: To protect skin and eyes when using cleaning solutions.
Brush or sprayer: For applying the solution to tight spaces or small grout lines.
Note: Do not use strong household acids or concentrated bleaches, as they may change the grout color or damage the mortar structure.
Complete steps for cleaning efflorescence
– Surface preparation
First, clean the surface with a soft brush or broom to remove dust and dirt. Remove any remaining mortar or adhesive residue stuck to the surface.
– Applying the cleaning solution
Pour the cleaning solution over the efflorescence according to the instructions, or spray it onto the grout lines. Use a brush or sponge to work the solution into the grout so it penetrates completely. Let the solution sit on the surface for 5 to 10 minutes to soften the deposits.
– Rinsing and wiping
Gently wash the surface with a damp sponge or soft brush to remove the solution and deposits. If the efflorescence is stubborn, repeat steps 2 and 3 until completely clean.
– Drying the surface
Dry the surface with a dry cloth or clean towel. Make sure no moisture remains on the grout, as leftover moisture will cause the efflorescence to return.
Protecting the grout after cleaning
After cleaning the efflorescence, you must protect the grout from water penetration:
Use a sealer: After the surface dries completely, apply a protective layer over the grout. This prevents water and salts from entering the mortar.
Periodic reapplication: In humid environments, repeat this process every 2 to 3 years for long-lasting protection.
Control environmental moisture: Proper ventilation with an exhaust fan or open window reduces humidity and extends the sealer’s life.
Additional tips for preventing efflorescence in the future
Choose water and moisture-resistant mortar and adhesive: Standard materials reduce water penetration.
Repair leaks before grouting: Fix any cracks or water leaks before starting the work.
Keep the surface dry: After washing or using water, dry the surface completely.
Proper substrate with waterproofing: Cover floors and walls with a standard waterproofing layer so moisture cannot enter the mortar.
Frequently asked questions about grout efflorescence
What is grout efflorescence and why does it occur?
Grout efflorescence refers to white or grayish deposits that appear on the joints between tiles and ceramics. This problem usually occurs due to water penetrating into the mortar and the accumulation of salts and lime on the surface. If moisture behind the tile is high or the mortar lacks sufficient quality, efflorescence forms faster.
Is grout efflorescence only a cosmetic problem?
No. Efflorescence initially ruins the appearance of tiles and ceramics, but if it continues, it can weaken the grout and reduce mortar adhesion. As a result, the tile lifespan decreases, and cracks or tile detachment may occur.
Can we remove efflorescence with surface cleaning alone?
Surface cleaning of efflorescence can provide a short-term result, but if we do not fix the cause of moisture penetration, the efflorescence will return. Therefore, we must identify and correct the moisture sources while cleaning.
What materials are suitable for cleaning efflorescence?
Non-acidic efflorescence cleaner: This solution dissolves salt and lime deposits without damaging the mortar or tile.
Soft brush or sponge: For removing surface deposits.
Clean water and dry cloth: For rinsing and final drying of the surface.
Note: Do not use strong acids or concentrated household bleaches, as they may damage the grout color and structure.
After cleaning, what should we do to prevent efflorescence from returning?
Apply a grout sealer after the surface dries completely.
Control environmental moisture with proper ventilation or an exhaust fan.
Keep the surface dry after washing or using water.
Use water-resistant mortar and adhesive in new tiling projects.
In which spaces does efflorescence occur most often?
Grout efflorescence is typically seen more often in bathrooms, toilets, kitchens, and humid spaces, because constant moisture and water flow exist there.
Is grout efflorescence dangerous?
Efflorescence is not directly dangerous to humans. However, it can damage the grout and reduce the durability of tiles and ceramics, which increases repair and renovation costs.
Does grout efflorescence disappear on its own over time without treatment?
No. Efflorescence will not disappear on its own without addressing its cause, and it will return with moisture. Surface cleaning is only temporary.
How can we prevent grout efflorescence?
Use water and salt-resistant mortar and adhesive.
Apply a standard waterproofing layer before tiling.
Ensure proper ventilation in humid spaces.
Repair any leaks or cracks before grouting.
Use a sealer periodically to protect the grout.

Final Summary
Grout efflorescence ruins the appearance of tiles and ceramics and can damage the mortar. To prevent it, we must first identify the cause of efflorescence, such as water penetration, poor mortar quality, or weak ventilation.
Proper cleaning involves using a non-acidic efflorescence remover, a soft brush, and rinsing with clean water. After that, applying a water-resistant sealer and controlling environmental moisture prevents the efflorescence from returning.
By following these steps and choosing moisture-resistant mortar and adhesive, your grout will remain clean, healthy, and free of efflorescence, and the appearance of your tiles and ceramics will be preserved.