
Can you do the tiling and baseboard installation yourself?
Have you ever thought about doing your own tiling or installing skirting boards at home? You might think that these tasks are only for professionals, but the truth is that with a little care and patience, you can do them too.
In this article, we are going to show you how to easily and efficiently install skirting boards without the need for a professional. Join us as we walk you through the process step by step.
Tools and supplies needed to get started
Before you start, you need to gather the necessary tools. Here is a list of the tools you will need:
- Tile cutter: For cutting tiles precisely.
- Level: To ensure a smooth installation.
- Spatula: To spread the adhesive.
- Tile and skirting board adhesive: To adhere tiles and skirting boards.
- Meter: For precise measurements.
- Gloves and safety glasses: To protect your hands and eyes.
You can get these tools from hardware stores. If you don’t want to spend a lot of money, you can rent some of these tools.
Preparing the wall surface for installing tiles or skirting boards
Before installing tiles or skirting boards, you need to prepare the wall surface. Follow these steps:
Clean the wall: Remove any dust, grease, or dirt from the wall surface.
Smooth the surface: If the wall has bumps or depressions, smooth them with putty or mortar.
Moisture-proofing: In wet areas such as bathrooms or kitchens, use moisture-proofing materials to prevent water from penetrating.
Check the wall for levelness: Use a level to make sure the wall is perfectly flat.
Proper wall preparation will make installing tiles and skirting boards easier and more efficient.
Step-by-step guide to installing wall tiles for beginners
Now that the wall is ready, we can start installing the tiles. Follow these steps:
Choosing the design and type of tile: Matte or glossy tiles, square or rectangular, each has its own characteristics. Choose the right tile according to your taste and needs.
Determining the starting point: It is better to start from the center of the wall or from the bottom so that the tiles are installed symmetrically.
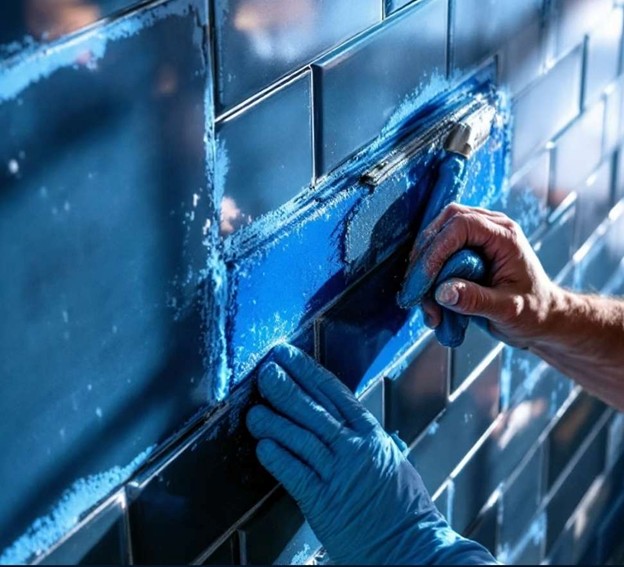
Using the adhesive: Apply the special adhesive evenly to the wall with a spatula.
Installing the tiles: Carefully place the tiles on the adhesive and stick them with gentle pressure.
Using the tile cross: Use the tile cross to maintain a uniform distance between the tiles.
Grouting: After the adhesive dries, fill the joints with grout and clean the surface of the tiles with a damp sponge.
By following these steps, you can tiling the wall professionally.

Simple instructions on how to install a wall cornice
Installing a Skirting Board: Step-by-Step Guide
Choose the Skirting Board Type:
Select PVC, MDF, or stone skirting boards based on the room. For wet areas like kitchens or bathrooms, PVC is ideal due to water resistance. For living rooms, MDF or wooden skirting boards offer a more elegant look.Measure the Walls Accurately:
Use a measuring tape to find the total length of the walls to know how much skirting board you need.Cut the Skirting Board:
Use a hand or electric saw to cut the boards to size. Make 45-degree angled cuts for corners to ensure a perfect fit.Apply Adhesive:
Evenly spread special skirting board adhesive (such as aquarium adhesive, silicone, or strong hot glue) on the back.Install the Cornice on the Wall:
Press the cornice gently against the wall, using a level to keep it straight. Hold firmly for a few seconds to secure it.Final Cleaning and Finishing:
Wipe off excess glue with a damp cloth. Fill any small gaps between the cornice and wall with putty or acrylic glue for a seamless finish.
Common beginner mistakes and how to avoid them
Many first-time tilers make a few common mistakes. If you know what they are, you can easily avoid them:
Over- or under-gluing: If you apply too much glue, it will ooze out of the edge of the tile. If you apply too little, the tile will not stick well.
Ignoring level: If you don’t pay attention to level, the tiles or skirting boards will be crooked and the whole wall will look ugly.
Rushing the grout: You shouldn’t apply grout before the glue has dried. This will cause the tiles to shift.
Going ahead without a plan: Before you start, draw a general plan without knowing exactly where you’re going to start.
By avoiding these mistakes, your work will look both more beautiful and more professional.
Maintenance and cleaning after installation
After installing your cornice and tile, you must do one important step: proper maintenance and cleaning. This step will make your cornice and tile work shine!
Let the glue and grout on the cornice and tile dry completely; this usually takes 24 to 48 hours.
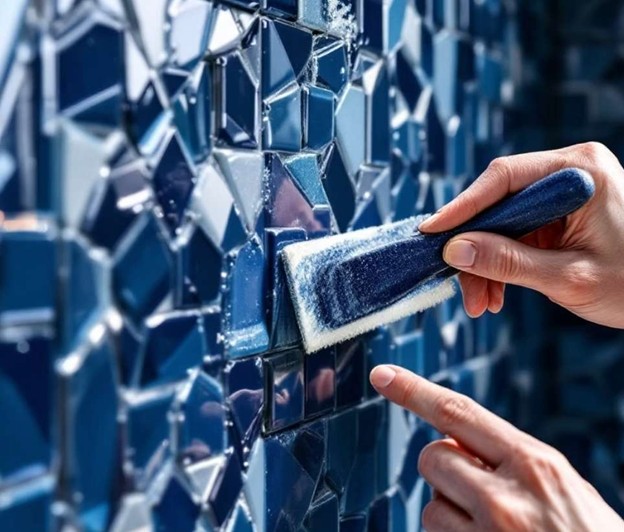
Use a damp cloth to clean the surface of the cornice and tile and the baseboard so that there are no stains of glue or grout.
You can use glass cleaner or white vinegar to make the cornice and tile shine beautifully.
After cleaning your cornice and tile, clean and store the tools you used; they may come in handy next time for another cornice and tile project!
Ready-made or cut tiles: which is right for you?
Ready-Made Tiles vs. Cutting Your Own Cornice and Tile
If your walls are smooth and simple, ready-made cornice and tile are quicker and easier to use.
However, for tricky spots like cabinet corners, pipes, or arches, cutting cornice and tile yourself—or having a professional do it—ensures a clean, precise fit.
If you lack cutting tools or experience, stick to ready-made cornice and tile. But if you’re handy, learning to cut cornice and tile can be a valuable skill.

Guide to choosing the right adhesive for tiles and skirting boards
If you want your tiles or skirting boards to stick like stone and not move for years, you need to choose the right adhesive.
Two types of adhesive are usually used for wall tiles:
- Powder adhesive: You have to mix it with water, it has very strong adhesion and is great for humid environments.
- Paste adhesive: It is ready-made and easy to use, especially for home projects and light tiling.
✅ For skirting boards (especially MDF or PVC skirting boards), these options are great:
- Aquarium or silicone adhesive: They dry quickly and have high adhesive strength.
- Hot glue (gun): Suitable for urgent jobs but less durable than silicone adhesive.
💡 Pro tip: Always test a small amount of adhesive on a surface to see how long it takes to dry and how firmly it sticks. This way you won’t make a mistake and your job will be done cleanly.
How to accurately cut tiles and skirting boards at home (without professional equipment)
So if you don’t have a professional tile cutter, don’t worry! You can make a clean and precise cut with a few simple tools.
For tiles:
- A hand tile cutter (glass cutter or stone cutter) is a small tool that draws a line on the tile. After drawing the line, you place the tile on the edge and with a quick push, you cut it in two.
- A file or sander: This is very necessary for smoothing sharp edges after cutting.
For skirting boards:
- A hand saw with a miter box: This is for cutting at angles in corners (for example, 45 degrees). If you don’t have this box, you can use a measuring tape and a regular pencil to mark your angle on the skirting board and then cut.
- A hammer or electric saw: If you have one, it will speed up your work a lot, but be careful because MDF skirting boards break quickly.
When cutting, remember to:
- Always wear safety glasses and gloves.
- Make the cut on a flat, stable surface to avoid mistakes.
- Cut a little more than you want so you can correct it if you make a mistake.
The correct method of grouting for greater durability and beauty
Grouting, or grouting, is an important step that will make your tiling look professional and clean and last longer.
Grouting Steps:
- After the tile adhesive has completely dried (about 24 to 48 hours), you can pour the grout.
- Mix the grout powder with water to obtain a mixture that is not too stiff, not too loose.
- With a plastic spatula or sponge, press the grout into the gaps between the tiles until they are completely filled.
- After a few minutes, wipe off the excess grout from the tiles with a damp sponge.
Golden Tips:
- The color of the grout is very important! If you want your tiles to stand out more, white grout is good. If you want stains to be less visible, gray or gray grout is a better option.
- Every 2-3 meters you pour grout, clean it right away so it doesn’t dry out and cause problems.
Important tips for installation in bathrooms and kitchens
Installing tiles or skirting boards in the bathroom and kitchen is a little different from the rest of the house. Because these areas are always exposed to moisture, steam, and even grease, there are a few things you should definitely keep in mind.
bathroom:
- It is very important that the adhesive is waterproof. Be sure to use a powder adhesive with high resistance to moisture.
- Before installing the tiles, apply a layer of moisture-proofing (such as liquid waterproofing or primer) to the wall.
- Pour the grout well and completely, because moisture can penetrate through these small joints and later cause mold and swelling of the wall.
- If you are also tiling the floor, be aware of the slope of the water.
kitchen:
- Grease and smoke are the main enemies of tiles. So use washable tiles and a smooth surface.
- Before installing, be sure to degrease the wall with thinner or special detergents. If the wall is greasy, the adhesive will not stick at all.
- Try to use stain-resistant, dark-colored tiles behind the stove and sink to make food stains less visible.
In these two spaces, proper installation will make your home look much better and at the same time protect you from future problems such as dampness, mold, and loose baseboards.
How to repair or renovate old tiles without destroying them?
You don’t have to remove and re-tile everywhere. Sometimes, with a few simple steps, you can clean and re-tile old tiles or even glue new ones on top of them!
Non-destructive repair methods:
- Special tile paint: There are paints on the market that are specifically designed for ceramic surfaces. You roll them on the tiles and the wall looks as new as day one!
- Waterproof tile stickers: A cheap, quick and clean option. Just clean the tiles well and stick the stickers on. You can even make your kitchen or bathroom look a lot more stylish with special designs.
- Re-grouting: If the joints are moldy or leaking, you can give the tiles a new look with just a simple grout.
Tile on tile? Yes!
If the wall is smooth and the old tile is intact, you can stick the new tile directly on the old tile. Just remember:
- First, roughen the surface of the previous tile with sandpaper or a chisel so that the adhesive sticks better.
- Use a strong adhesive specifically for this purpose.
- Level the surface so that you don’t have any problems with installation later.
Benefits of doing a DIY project (Do It Yourself)
So, why should we do it ourselves? Doing your own tiling or installing skirting boards is not just about saving money.
You gain confidence. When your project is finished and you look at the result, you get a great feeling. That feeling of “I did it myself!” is invaluable.
Your costs are halved. If you want to hire a professional, their fee can sometimes be more than the cost of the tiles. But with DIY, you only pay for the materials and do the work yourself.
You learn a skill. Today it’s wall tiling, tomorrow it might be flooring or even a complete kitchen renovation!
You have complete control. You decide what design to use, where to start, how much time to spend.
And most importantly, your creativity will flourish. Maybe you’ll end up with a cool idea and want to design and implement the rest of your house yourself!
Final conclusion: Bring your home to life with your own hands!
Now that we’ve covered all the steps and important tips for installing cornice and tile, it’s time to take action with full confidence and start your tiling project. Doing the cornice and tile installation right won’t just save you money, it will also help you unleash your creativity and feel good about doing it yourself!
Remember that careful preparation and choosing the right materials for cornice and tile are the keys to a successful project. With the right tools, planning, and a little patience, nothing can stand in your way. Always draw a simple plan before you start and use a level to make sure everything is straight and level.
In the end, when the job is done and the cornice and tile are installed correctly, you’ll feel a sense of satisfaction and pride in your home. Even if it’s your first time, don’t be afraid to make mistakes and keep going. Experience is the best teacher.
So roll up your sleeves and get to work on your cornice and tile project!

Downloadable checklist for installing skirting boards and tiles
To make it easier and not to forget any steps, I have prepared this complete checklist for installing tiles and skirting boards. You can download this and keep it next to you so that you can follow each step carefully.
Tile and skirting board installation checklist:
Preparing the walls:
Clean and dry the walls.
Check the wall surface to ensure it is flat.
If the wall is damp or cracked, use insulating materials first.
Choosing tiles and skirting boards:
Choose the type of tiles and skirting boards based on your needs and the space.
Accurately measure the walls and cut the skirting boards correctly.
Choose the right adhesive (powder or paste adhesive for tiles, silicone or aquarium adhesive for skirting boards).
Installing the tiles:
Start tiling from the middle of the wall for good balance.
Apply adhesive to the back of the tiles and place them on the wall.
Use a level to keep tiles flat.
Maintain proper joint spacing between tiles.
Gluing and grouting:
After adhesive dries, prepare grout.
Use a spatula to spread grout between tiles.
Clean excess grout with a damp sponge.
Install the skirting board:
Attach skirting boards to the wall with suitable adhesive.
Ensure the skirting boards are smooth and level.
Final cleaning and finishing:
Wipe off excess adhesive and grout with a damp cloth.
Clean tools after finishing.
Use glass cleaner or white vinegar to make tiles shine.
This checklist provides a comprehensive guide to installing tiles and skirting boards in your home. Just follow the steps and enjoy every step!